
shelterlogic max ap canopy 10×20 instructions
ShelterLogic Max AP Canopy 10×20 Instructions: A Comprehensive Guide
ShelterLogic provides durable‚ versatile outdoor structures with easy DIY setup‚ offering protection from elements like sun‚ rain‚ and wind for various needs.
Understanding the ShelterLogic Max AP Canopy
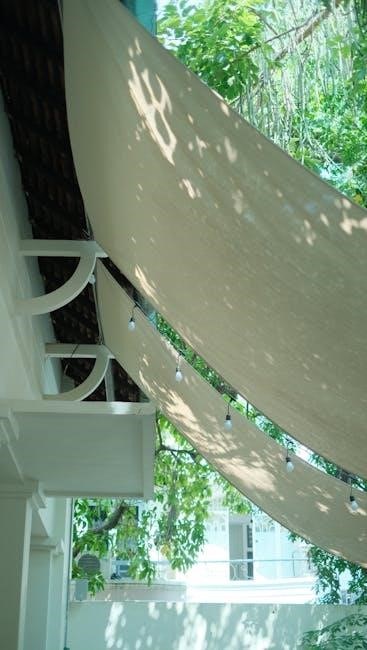
ShelterLogic’s Max AP Canopy series represents a significant advancement in portable shelter technology‚ designed for diverse applications – from providing shade at events to sheltering equipment and vehicles. The “AP” designation signifies an enhanced frame design‚ incorporating robust steel components and the innovative ShelterLock stabilizers.
These canopies are engineered for quick assembly‚ requiring minimal tools and expertise‚ making them ideal for homeowners and professionals alike. Their durable‚ UV-treated polyethylene covers offer reliable protection against the elements‚ resisting water‚ mildew‚ and harmful UV rays. The 10×20 model specifically provides ample coverage‚ suitable for larger gatherings or substantial storage needs. Understanding these core features is crucial for proper setup and maximizing the canopy’s lifespan.
What is the ShelterLogic Max AP Series?
ShelterLogic’s Max AP Series is a line of portable shelters built for versatility and durability‚ offering solutions for storage‚ shade‚ and protection from the elements. With over 30 years of experience‚ ShelterLogic focuses on robust steel frames and treated fabric covers. These structures are designed to be moved easily‚ unlike permanent buildings‚ adapting to changing property needs.
The series includes options like portable garages‚ run-in shelters‚ and canopy tents‚ catering to diverse requirements. A key feature is the ShelterLock stabilizer system‚ enhancing frame stability. Replacement covers are readily available‚ easily installed in minutes‚ and affordable‚ avoiding the need for cheaper‚ less durable alternatives.
Key Features of the 10×20 Model
The ShelterLogic Max AP 10×20 canopy boasts a spacious area ideal for vehicle storage‚ equipment cover‚ or large event shade. Its robust steel frame ensures stability‚ while the durable‚ UV-treated polyethylene cover resists water and mildew. The patented ShelterLock stabilizers significantly enhance frame integrity‚ crucial for withstanding wind and weather.
This model’s portability allows for flexible placement on your property. Quick and easy DIY setup minimizes assembly time. Replacement covers are specifically designed for a fast‚ 15-minute installation‚ offering a cost-effective alternative to tarp replacements. It’s a versatile solution for various outdoor needs‚ combining strength and convenience.
Unboxing and Inventory
Carefully unpack all components and verify against the parts list to ensure everything is present before beginning the ShelterLogic canopy assembly process.
Checking Package Contents
Upon receiving your ShelterLogic Max AP 10×20 canopy‚ the initial step involves a thorough examination of the package contents. Carefully open the box and lay out all the components in a clear‚ organized space. Refer to the included parts list – typically found within the packaging or available online – to confirm that every item is accounted for.
This list will detail the quantity of each part‚ including frame poles‚ corner connectors‚ base rails‚ roof frame pieces‚ canopy cover‚ ShelterLock stabilizers‚ and anchoring accessories. Note any discrepancies immediately. Missing parts can significantly delay assembly‚ so it’s crucial to address this early on. Inspect each component for any signs of damage incurred during shipping‚ such as bends‚ breaks‚ or tears. Document any damage with photographs for potential warranty claims.
Identifying All Parts
Accurate part identification is vital for a smooth assembly process. The ShelterLogic Max AP 10×20 canopy kit includes several distinct components. Frame poles are typically straight‚ metal sections forming the canopy’s structure. Corner connectors‚ often made of robust plastic‚ join these poles. Base rails create the foundation‚ while roof frame pieces add overhead support.
The canopy cover‚ usually a durable polyethylene fabric‚ provides weather protection. ShelterLock stabilizers enhance frame rigidity‚ resisting wind and weather. Anchoring accessories – like auger anchors or ratchet straps – secure the canopy to the ground. Familiarize yourself with each part’s shape‚ size‚ and function before beginning assembly. Refer to the parts list and diagrams for clarification‚ ensuring you can confidently distinguish between similar-looking components.
Tools Required for Assembly
Successful assembly of your ShelterLogic Max AP 10×20 canopy requires a few essential tools. A rubber mallet proves invaluable for gently connecting frame components without causing damage. A ratchet set‚ or adjustable wrench‚ is needed to tighten bolts and secure connections. While not always mandatory‚ power drills with appropriate bits can significantly speed up the process.
For anchoring‚ a hammer or mallet assists in driving auger anchors into the ground. Measuring tape ensures accurate placement and alignment during setup. Gloves protect your hands‚ and safety glasses shield your eyes. Having a level handy guarantees a stable‚ even canopy structure. These tools‚ combined with the provided hardware‚ will facilitate a straightforward and efficient assembly experience.
Frame Assembly
Begin by connecting the base rails‚ then add corner connectors for stability. Install roof frame poles‚ and finally‚ secure everything using ShelterLock stabilizers.
Assembling the Base Rails
Start the frame assembly by laying out all the base rail sections on a flat‚ clear surface; These are typically the longest straight pieces included in your kit. Connect the rails using the provided connectors – ensure they click securely into place‚ forming a rectangular base.
Pay close attention to the orientation of the rails; some may have pre-drilled holes or specific markings for attaching other components. Double-check that all connections are tight and aligned before proceeding. A properly assembled base is crucial for the overall stability of the canopy.
If any resistance is met during connection‚ avoid forcing the pieces; re-examine the connectors and rail ends for proper alignment. A solid base rail structure is the foundation for a durable and reliable canopy.
Connecting the Corner Connectors
With the base rails assembled‚ it’s time to attach the corner connectors. These robust pieces join the rails at each corner‚ providing essential structural support. Align the corner connectors with the ends of the base rails‚ ensuring a flush fit.
Secure each connector using the provided bolts and screws – typically‚ these require a wrench or screwdriver. Tighten the fasteners firmly‚ but avoid over-tightening‚ which could damage the connectors or rails. Verify that all four corners are securely connected and that the frame remains square.
Properly connected corner connectors are vital for the canopy’s stability‚ especially in windy conditions. A wobbly frame indicates loose connections that need immediate attention.
Installing the Roof Frame Poles
Now‚ carefully install the roof frame poles onto the assembled base. These poles create the canopy’s height and support the cover. Typically‚ these poles slide into the designated openings on the corner connectors. Ensure each pole is fully inserted and securely locked into place – listen for a click or engage any locking mechanisms provided.
Work systematically‚ installing one pole at a time to maintain balance and control. Double-check that all poles are upright and aligned before proceeding; The roof frame poles are crucial for withstanding weight from snow or wind‚ so secure installation is paramount.
Securing the Frame with ShelterLock Stabilizers
ShelterLock stabilizers are key to the canopy’s structural integrity‚ especially in windy conditions. These stabilizers connect the roof frame poles to the base rails‚ providing crucial reinforcement against swaying and potential collapse. Attach the stabilizers at each corner‚ following the diagram in your instruction manual.
Ensure the stabilizers are tightly fastened‚ utilizing the provided pins or screws. Properly installed ShelterLock stabilizers significantly enhance the canopy’s ability to withstand external forces‚ offering peace of mind and extending its lifespan. Don’t skip this step – it’s vital for safety!

Cover Installation
Installing the canopy cover involves carefully draping it over the assembled frame‚ ensuring proper alignment and tension for optimal protection and durability.
Attaching the Canopy Cover
Begin by carefully unrolling the canopy cover and positioning it over the assembled frame‚ ensuring the designated side faces upwards. Align the cover’s edges with the frame’s perimeter‚ paying close attention to corner placements for a secure fit. ShelterLogic replacement covers are designed for quick attachment‚ often taking as little as fifteen minutes.
Utilize the provided straps‚ clips‚ or Velcro fasteners to connect the cover to the frame. Start with the corners‚ securing them firmly before moving to the sides. Ensure even distribution of tension across the cover to prevent sagging or bunching. Properly securing the cover is crucial for maintaining structural integrity‚ especially during inclement weather. Double-check all attachment points to confirm a snug and reliable connection‚ maximizing the canopy’s protective capabilities.
Ensuring Proper Cover Tension
Achieving optimal canopy cover tension is vital for stability and preventing water pooling. After initial attachment‚ systematically inspect the cover’s surface for any slack areas or wrinkles. Adjust the straps or fasteners to evenly distribute tension across the entire canopy. Avoid over-tightening‚ which could strain the frame or damage the cover material.
A taut cover minimizes wind resistance and reduces the risk of sagging during rainfall. ShelterLogic designs prioritize durability‚ but proper tension enhances performance. Periodically re-check tension‚ especially after exposure to strong winds or heavy precipitation. Consistent monitoring and adjustment will prolong the cover’s lifespan and maintain the canopy’s intended shape and functionality‚ ensuring reliable protection.
Securing the Cover to the Frame
Properly securing the canopy cover to the frame is crucial for withstanding weather conditions. Begin by aligning the cover’s edges with the frame’s perimeter‚ ensuring an even overlap. Utilize the provided straps‚ clips‚ or fasteners to attach the cover securely at each designated point. ShelterLogic replacement covers are designed for quick installation‚ often achievable in under 15 minutes.
Ensure all fasteners are tightened adequately‚ but avoid over-tightening to prevent damage. Double-check each connection point to confirm a firm hold. A secure attachment prevents flapping in the wind and minimizes the risk of the cover detaching during storms‚ maximizing the canopy’s protective capabilities and longevity.
Anchoring and Stabilization
Secure your ShelterLogic canopy with ground anchors‚ ratchet straps‚ or auger anchors to prevent movement from wind or inclement weather conditions.
Ground Anchoring Options
Selecting the right ground anchoring system is crucial for your ShelterLogic Max AP Canopy’s stability‚ especially in varying weather conditions. Several options exist‚ each suited to different ground types and anticipated wind loads. Traditional stakes work well in softer soils‚ but may not provide sufficient hold in rocky or sandy terrain. Auger anchors‚ which screw into the ground‚ offer superior holding power and are ideal for loose or challenging soil compositions.
Ratchet straps‚ when combined with suitable anchors‚ provide an extra layer of security‚ allowing you to tension the canopy and minimize movement. Consider using a combination of anchoring methods for maximum stability. For temporary setups‚ sandbags or weight bags can offer a quick and easy solution‚ though they are less reliable than ground anchors. Always assess your site conditions and choose anchors appropriate for the expected weather.
Using Auger Anchors
Auger anchors are highly recommended for securing your ShelterLogic Max AP Canopy‚ particularly in less-than-ideal ground conditions. Begin by positioning the anchor at a 45-degree angle away from the canopy’s frame. Using a steel bar or dedicated tool‚ twist the anchor into the ground‚ applying firm and consistent pressure. Continue twisting until the anchor is fully seated and offers significant resistance.
Ensure the anchor is securely fastened before attaching the ratchet strap or rope. Connect the strap to both the anchor and the canopy’s anchor point‚ then tighten the ratchet to create tension. Regularly inspect the anchors‚ especially after periods of heavy wind or rain‚ to confirm they remain firmly embedded in the ground.
Securing with Ratchet Straps
Ratchet straps provide an adjustable and robust method for securing your ShelterLogic canopy to ground anchors or other stable points. Attach the strap’s hook end to the canopy’s designated anchor point – typically a loop or D-ring on the frame. Then‚ connect the strap’s other end to your chosen anchor‚ like an auger or a sturdy object.
Begin ratcheting the strap‚ ensuring even tension distribution. Avoid over-tightening‚ which could damage the canopy frame. Regularly inspect the straps for wear and tear‚ and readjust as needed to maintain secure anchoring‚ especially during inclement weather. Proper strap tension is crucial for canopy stability.

Maintenance and Care
Regular inspection and cleaning extend your canopy’s life; promptly address any frame damage and consider replacement covers for optimal protection.
Cleaning the Canopy Cover

Maintaining the canopy cover is crucial for longevity. Regularly wash the cover with mild soap and water‚ using a soft brush or sponge to avoid damaging the fabric. Avoid harsh chemicals or abrasive cleaners‚ as these can degrade the material and reduce its UV resistance. Rinse thoroughly with clean water to remove all soap residue.
For stubborn stains or mildew‚ a diluted solution of bleach and water can be used‚ but test it on an inconspicuous area first. Allow the cover to air dry completely before reinstalling it on the frame. Periodic cleaning prevents dirt buildup‚ which can contribute to premature wear and tear‚ ensuring your ShelterLogic canopy continues to provide reliable protection for years to come. Promptly address any tears or punctures to prevent further damage.
Inspecting the Frame for Damage
Regular frame inspections are vital for safety and stability. Carefully examine all steel frame components for signs of rust‚ bending‚ or cracking‚ particularly at connection points. Pay close attention to the ShelterLock stabilizers‚ ensuring they are securely fastened and undamaged. Check the corner connectors and base rails for any deformation or weakness.
If rust is present‚ remove it with a wire brush and apply a rust-resistant paint or coating. Replace any damaged or weakened parts immediately to maintain the structural integrity of the canopy. A compromised frame can pose a safety hazard‚ especially during inclement weather. Consistent inspection ensures your ShelterLogic canopy remains a secure and reliable shelter.
Replacing the Canopy Cover
ShelterLogic replacement covers are designed for quick and easy installation‚ often completed in as little as 15 minutes. Begin by removing the old cover‚ detaching it from the frame at all connection points. Ensure the new cover is oriented correctly before attaching it‚ aligning any designated seams or edges.

Secure the cover to the frame‚ utilizing the existing attachment points and fasteners. Verify proper tension across the cover to prevent sagging and ensure water runoff. Avoid over-tightening‚ which could damage the fabric. ShelterLogic offers affordable‚ durable replacements‚ eliminating the need for inferior tarps. A new cover restores protection and extends the life of your canopy.

Troubleshooting Common Issues
ShelterLogic canopies may experience instability‚ sagging‚ or anchor failure; address these with frame adjustments‚ tensioning‚ and secure ground anchoring techniques.
Frame Instability
If your ShelterLogic Max AP canopy frame feels unstable‚ begin by thoroughly inspecting all connections. Ensure that corner connectors are securely locked into place and that all frame poles are fully inserted. Utilize the patented ShelterLock Stabilizers – these are crucial for reinforcing the frame and preventing wobbling‚ especially in windy conditions.
Double-check that the base rails are level and properly aligned. Uneven ground can significantly contribute to instability. Consider using shims under the base rails to achieve a level surface. If instability persists‚ verify that all anchors are firmly secured in the ground‚ as a loose anchor can compromise the entire structure’s stability. Remember‚ a robust frame is fundamental to the canopy’s overall performance and longevity.
Cover Sagging
Addressing cover sagging on your ShelterLogic Max AP canopy requires attention to tension and support. Initially‚ confirm the cover is correctly attached to the frame‚ ensuring it’s evenly distributed. Proper tension is vital; re-tighten all cover fasteners‚ like bungees or straps‚ to eliminate slack.
If sagging continues‚ especially after rain or snowfall‚ consider adding additional support. Center support poles (sold separately) can provide uplift and prevent water pooling. Regularly inspect the cover for wear and tear‚ as damaged fabric loses its ability to maintain tension. ShelterLogic offers replacement covers designed for quick installation‚ restoring a taut and secure fit. Maintaining proper cover tension extends its lifespan and prevents damage.
Anchor Failure
Anchor failure is a serious concern with any canopy‚ especially the ShelterLogic Max AP. Regularly inspect your anchors – auger‚ ratchet‚ or ground stakes – for bending‚ corrosion‚ or loosening; Soil conditions significantly impact anchor performance; sandy or loose soil requires longer or wider anchors.
If using auger anchors‚ ensure they are fully screwed into the ground. For ratchet straps‚ verify secure attachment points on both the canopy and the ground. ShelterLogic recommends using multiple anchoring points‚ even in calm conditions‚ for added security. Replace damaged anchors immediately. Consider upgrading to heavier-duty anchors for areas prone to high winds or severe weather. Proper anchoring is crucial for canopy stability and safety.

Safety Precautions
Prioritize safety during setup and use; consider wind/weather‚ follow guidelines‚ and ensure proper disassembly for storage to prevent damage or injury.
Wind and Weather Considerations
ShelterLogic canopies offer protection‚ but understanding weather limitations is crucial for safety and longevity. Always monitor weather forecasts before erecting your 10×20 canopy‚ and be prepared to take action if severe conditions are predicted. Strong winds pose the greatest risk; ensure the canopy is securely anchored using appropriate methods – auger anchors and ratchet straps are highly recommended‚ especially in exposed locations.
Never use the canopy during a storm or high-wind event. Disassembly is the safest option. Regularly inspect the frame‚ cover‚ and anchors for any signs of wear or damage‚ particularly after exposure to inclement weather. A compromised structure is more vulnerable to wind uplift. Remember‚ these canopies are designed to provide temporary shelter‚ not withstand extreme weather events. Prioritize safety and avoid using the canopy when conditions are unfavorable.
Proper Usage Guidelines
ShelterLogic canopies are designed for versatile use‚ from shade and shelter to temporary storage. However‚ adhering to proper usage guidelines ensures safety and maximizes the product’s lifespan. Avoid placing excessive weight on the frame‚ as this can lead to instability or damage. Do not hang objects from the canopy frame that could compromise its structural integrity.
Regularly inspect all connections and anchors to confirm they remain secure. The canopy is not intended for permanent structures; it’s a portable solution. Ensure adequate ventilation to prevent condensation buildup‚ especially when using it as enclosed shelter. Follow all safety precautions‚ particularly regarding wind and weather‚ and always prioritize safe assembly and disassembly procedures.
Disassembly and Storage
ShelterLogic canopies are designed for portability‚ making disassembly and storage crucial aspects of ownership. Begin by removing the canopy cover‚ carefully folding it for compact storage. Detach the anchors and stabilizers‚ storing them with the frame components to prevent loss. Disassemble the frame systematically‚ following the assembly instructions in reverse order.
Before storing‚ thoroughly clean and dry all parts to prevent mildew or rust. Store the canopy in a dry‚ sheltered location‚ away from direct sunlight and extreme temperatures. Proper storage extends the canopy’s lifespan and ensures it’s ready for future use. Consider using the original packaging for convenient and protected storage;
ShelterLogic Warranty Information

ShelterLogic offers warranty coverage on its products‚ protecting against manufacturing defects and material failures for a specified period‚ ensuring customer satisfaction.
Understanding the Warranty Coverage
ShelterLogic’s warranty is designed to protect customers against defects in materials and workmanship under normal use. The specific duration of the warranty varies depending on the product line‚ with canopy covers typically having a shorter warranty period than the steel frame.
The warranty generally doesn’t cover damage resulting from improper installation‚ misuse‚ acts of nature (like extreme wind or snow loads)‚ or failure to follow provided instructions. Regular maintenance‚ such as cleaning and inspection‚ is often a condition of maintaining warranty validity.

Replacement covers are also often covered‚ offering a cost-effective solution compared to purchasing aftermarket options. Understanding these details ensures you can fully benefit from ShelterLogic’s commitment to quality and customer support.
Making a Warranty Claim
To initiate a warranty claim with ShelterLogic‚ gather your proof of purchase (receipt or invoice) and detailed photos or videos documenting the defect. Contact ShelterLogic customer support through their website or phone number‚ providing your product information and a clear description of the issue.
A representative will guide you through the claim process‚ potentially requesting additional information or requiring you to return the defective part for inspection. Be prepared to provide details about the installation and usage of the canopy.
Approved claims typically result in a replacement part or‚ in some cases‚ a refund‚ at ShelterLogic’s discretion. Retain all communication and documentation throughout the process.
Contacting ShelterLogic Support
For assistance with your ShelterLogic Max AP Canopy 10×20‚ reach out to their dedicated customer support team. The primary method is through their official website‚ where you’ll find a comprehensive FAQ section and a contact form for submitting inquiries. Alternatively‚ you can connect via phone during their business hours – details are available on their site.
When contacting support‚ have your model number and proof of purchase readily available to expedite the process. Be prepared to clearly describe your issue and‚ if possible‚ provide photos or videos illustrating the problem.
ShelterLogic aims to provide prompt and helpful assistance to ensure customer satisfaction.
Related Posts

boppy baby carrier instructions
Discover how to use your Boppy Baby Carrier with ease! Get step-by-step instructions, safety tips, and comfort hacks to keep your little one safe and comfortable. Learn how to use your Boppy Baby Carrier perfectly!

bradford exchange cuckoo clock instructions
Uh oh! Did your Bradford Exchange cuckoo clock instructions fly the coop? Don’t worry, we’ve got you covered! Get back to chirping time in no time!
surgifoam instructions
Get step-by-step Surgifoam instructions for safe use, learn how to apply with our easy guide and tips at 2bearsandcounting.com